Step
| Description
| Screenshots
|
2 Standard and Custom Views
| Caretrax provides a set of Standard list views that are ready to be used by all the users in your organization. In addition, you can also create list views and share with colleagues in your organization.
- Standard List Views: You can modify the standard views and sort the order of the columns in the list. You cannot delete these list views.
- Custom List Views: You can create, modify and delete the custom views and you can also sort the order of the columns in the list.
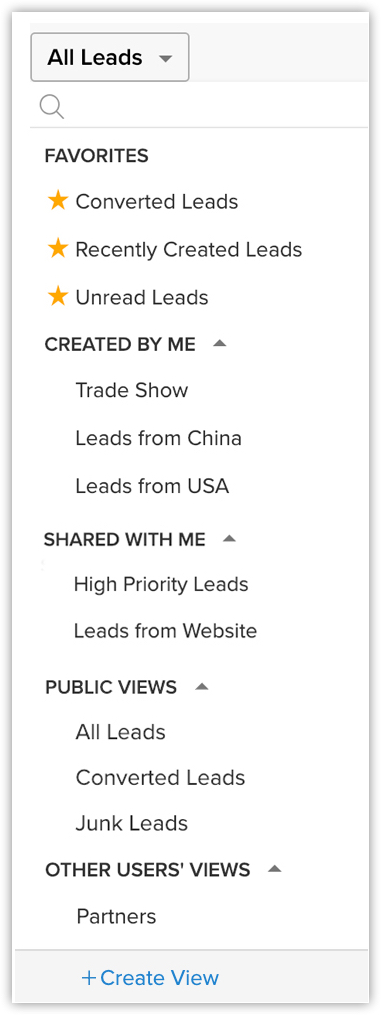
List views are categorized under the following:
- Favourites - Views that you have marked as favourites will be displayed.
- Created By Me - Custom views created by you (the user) will be displayed.
- Shared With Me - Custom views explicitly shared with you by any user in your Caretrax account, will be displayed.
- Public Views - Views that are accessible to everyone in your Caretrax count will be displayed.
- Other Users' Views - Custom views created by fellow users in your Caretrax account, which doesn't come under the above categories will be displayed. Only Administrators will be able to see the views created by other users.
Standard List Views These are pre-defined sets of list views that are ready to be used by all the users in the organization. Depending on your requirements, you can modify the standard views and sort the order of the columns in the list. However, the standard list views cannot be deleted. You can select a list view from the module's home page by clicking on the View icon. Some standard list views are: All Records, My Records, Recently Created Records, Recently Modified Records, Recently Viewed Records, etc.
|  |
| 3 To create custom views | Create Custom List Views
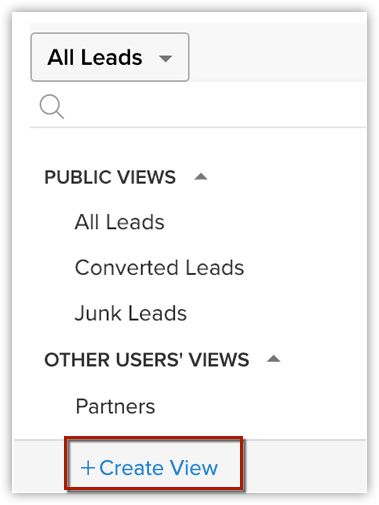
You can define criteria and create your own list view, and the records will be filtered based on the criteria you set. You can modify, delete, and also sort the order of the columns in a custom list view. The list views created by the user are listed under Created By Me. - Click the [Module] Tab.( For e.g. Leads, Contacts, Accounts, etc.)
- In the [Module] Home page, move your mouse pointer to the list view's drop-down.
- Click the Create View link.
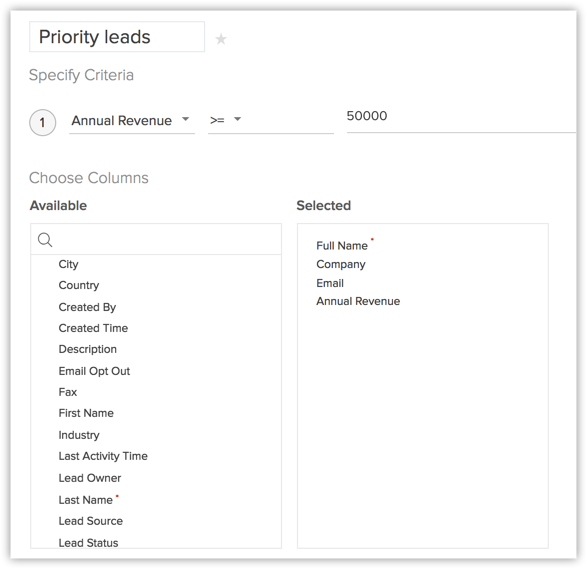
In the New View page, do the following:
- Enter the custom View Name.
- Mark as Favorite, if required.
The custom list views marked as favorite will be listed first in the list view drop-down. - Specify Criteria to filter the records.
Tags can also be used as part of Criteria to filter records. - Select the columns to be displayed in the module view.
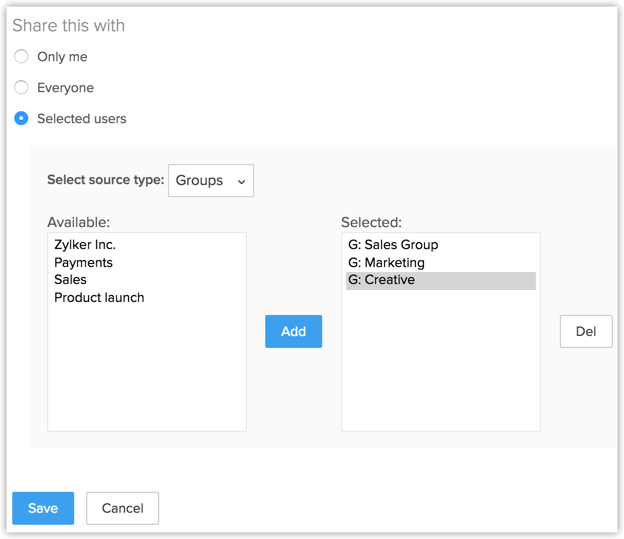
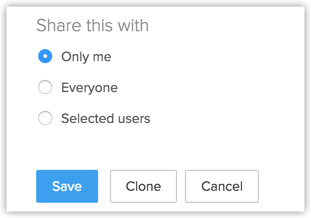
- Under the Share this with section, choose who can see this view.
- Click Save.
|  |
| 4 Specifying List View Criteria | The following table lists the criteria options for certain types of fields:
Note
- You can add up to 25 criteria.
- Specify the numbers without commas. For example, specify 15,000 as 15000.
- If you select the None option, custom view will not be created.
- Age inDays option is very useful for the Date and DateTime fields. It can be used to filter records such as, leads that were created within the last 15 days, deals that were closed in the past 10 days, or users whose subscription was renewed in the lats 5 days.
- Due in Days is an option that lets you set criteria for Date and DateTime fields based on a specific number of due days. For example, if you want to filter deals that are due to be closed in 6 days, you can create a custom view in the deals module with the criteria "Closing Date" "Due in Days = 6".
- Full Name is a combination of the First Name and the Last Name. Full Name will be displayed in the Leads and Contacts module list views as Lead Name and Contact Name respectively.
- Selecting List View Columns
After selecting the columns from the Selected Columns list box, you can change the order or remove the unnecessary columns.
 Note
- It is better to select less than 10 columns to avoid horizontal scrolling in List View.
| Field Type
| Criteria Options
| String fields like:
- First Name
- Mobile
- Email
- Website
- Industry
- Title
| - Created By
- Skype ID
- Phone
- Salutation
- Company
- State
|
| - is
- isn't
- is before
- is after
- between
- not between
- Today
- Tomorrow
- Tomorrow Onwards
- Yesterday
- Till Yesterday
- Last Month
- Current Month
- Next Month
- Last Week
- Current Week
- Next Week
- is empty
- is not empty
- Age in Days
- Due in Days
| Numeric fields like:
- Age
- My Percentage
- Age in Days
| |
| - =
- !=
- <
- <=
- >
- >=
- is empty
- is not empty
| Date & DateTime fields like:
- Created Time
- Modified Time
| |
| - is
- isn't
- is before
- is after
- between
- not between
- Today
- Tomorrow
- Tomorrow Onwards
- Yesterday
- Till Yesterday
- Last Month
- Current Month
- Next Month
- Last Week
- Current Week
- Next Week
- is empty
- is not empty
- Age in Days
- Due in Days
| Boolean fields like:
| |
|
| 5 Setting up Permissions to the List View | In the Accessibility Details section, define the user's accessibility to view the custom lists. The following options are available:
- All users are allowed to view this custom view.
- Show this custom view only to me.
- Allow the following users to view this custom view.
|
|
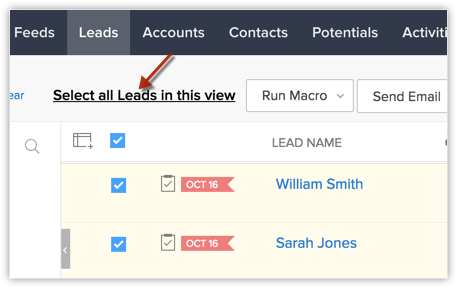
6 Select All Records in a Custom List View | To select all records in a custom view
- Go to the desired module.
- Choose the desired custom list view.
- Click the Select All check box on the first page.
- Click the Select All [Records] in this View that appears.
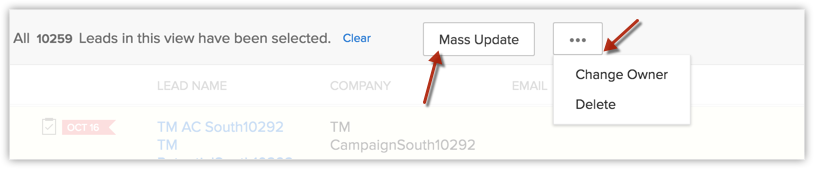
- All the records in that list view will be selected.
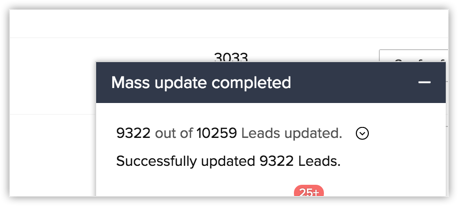
Once all the records in that custom list view are selected, you can perform the following bulk operations on those leads.
| |
7 Clone Custom List View | The custom views that you create can be duplicated and a similar list view can be created. Please note that the default views cannot be cloned or deleted.
To clone custom list views
- Click the [Module] Tab.( For e.g.. Leads, Contacts, Accounts, etc.)
- In the [Module] Home page, select the list view that you want to duplicate.
- Click the Edit link.
- Then click on the Clone button.
In the Clone View page, do the following:
- Enter the custom View Name.
- Select the columns to be displayed in the View mode.
- Choose the option as to who can see this view.
- Select the Specify Criteria check box and specify the criteria.
- Click Save.
| |
8 Edit Standard List View | If you want to add or remove columns in the list view, you can edit the standard list views that are provided by default in Caretrax. Please note that you cannot edit the criteria or rename these pre-defined list views.
To edit standard list views
- Click the [Module] Tab. (For e.g. Leads, Contacts, Accounts, etc.)
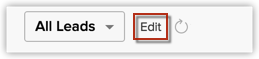
- In the [Module] Home page, select the list view that you want to edit.
- Click the Edit link.
- In the Edit View page, select and move the fields to the Available Columns list box.
After selecting the columns you can change the order of the columns or remove unnecessary columns from the Selected Columns list box. - Click Save.
| |
| 9 Sort Records in List View | Records in the list view can be sorted in ascending or descending order.
To sort records
- Click the [Module] Tab. (For e.g. Leads, Contacts, Accounts, etc.)
- In the [Module] Home page, select the list view that you want to see.
- Click on the column heading and then select Ascending or Descending option to sort the records.
| |
10 Delete Custom List View | The custom views that you create can be deleted if required. Please note that the pre-defined list views cannot be deleted.
To delete custom list views
- Click the [Module] Tab. (For e.g. Leads, Contacts, Accounts, etc.)
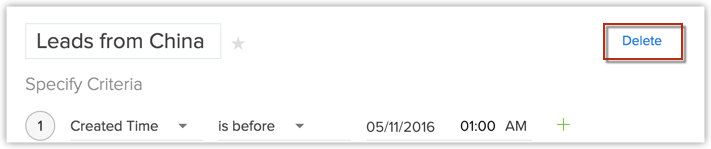
- In the [Module] Home page, select the list view that you want to delete.
- Click the Edit link.
- Click on Delete.
| |